HomeWindows
ByBhishu Acharya

Sometimes, the process of SFC scannow may get stuck for a long time. Also, there is a situation when it even freezes our entire system.
Furthermore, we might get various system errors. Well, the possible causes that prevent us from using SFC scannow in Windows 11 are:
- We did not access Command Prompt or Windows Powershell as the administrator.
- Our computer didn’t shut down properly, which might have corrupted some of our system files or a disk.
- The SFC tool is not permitted to access the WinSXS folder.
- We haven’t enabled Windows Module Installer on our computer.
- There might be major hardware-related issues on our PCs.
There are both basic and advanced methods for fixing the SFC scannow issues. Nonetheless, we have tried to make the steps convenient for everyone.
Run Command Prompt as Administrator
We must access the Command Prompt as an admin if a computer has multiple users. This is because Windows doesn’t allow a normal user to access administrative functions like SFC /scannow.
To run cmd as administrator, simply right-click on the application. Now, choose Run as administrator.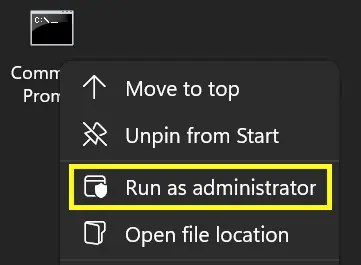
Then, check if the command works. If it doesn’t, there could be serious issues on your PC.
Try Starting the Windows Modules Installer
Microsoft has provided a special service called Windows Modules Installer. Starting the installer will install all the updates available in Windows 11.
So, if the SFC scan is outdated, the service will update it, and the command might work. Well, we can start the Windows Modules Installer using two techniques.
From Services:
Follow the general guide below to start Windows Modules Installer from Windows Services:
- Search for Services in the Start Menu.
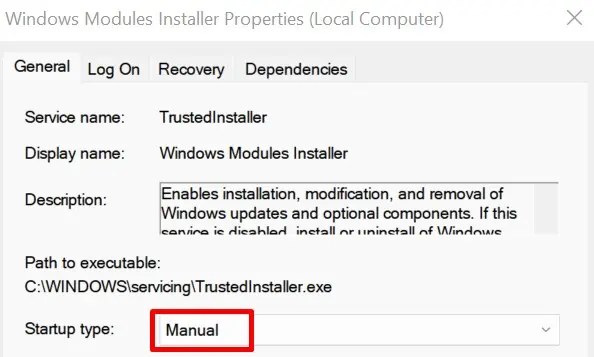
- Double-click on the Windows Modules Installer to open its properties.
- Under General, make sure the Startup type is set to Manual.

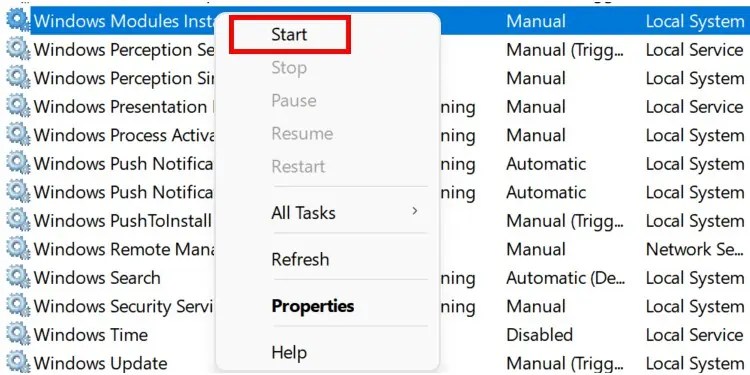
- Now, return to the Services window and right-click on the Windows Modules Installer.
- Select Start to run the service. To close the service, you can right-click on it and select Stop.

From Command Prompt:
Interestingly, you can start Windows Modules Installer from a Windows terminal too. After launching Command Prompt as administrator, simply type the following command: net start trustedinstaller.
While the installer is running, try to run the SFC /scannow command again. If this doesn’t fix your problem, try other techniques.
Check Your Hard Disk Condition Using chkdsk
Often, SFC scannow has issues when a hard drive is in bad condition. Therefore, you should now check the condition of your hard disk following the steps below:
- Launch Command Prompt and type:
chkdsk [Your System Drive]: /r
- Now, the prompt asks you to schedule the system check next time you restart your PC. To confirm, type y or Y.

- Next, restart your computer, and your chkdsk will run automatically. But, you will have to wait for several minutes until the bad sectors of the disk are recovered.
Change Permissions for WinSXS Using icacls
If the system doesn’t have permission to access WinSXS, it’s very likely that commands like SFC scan won’t work. So, here’s how you can change the permissions for WinSXS:
- Navigate to your Command Prompt and run it as the administrator.
- Then, type the following command:
icacls [Your System Drive]:\Windows\winsxs
- The prompt notifies you that your file is processed successfully in about a second.
Once you’ve changed the permissions, try the SFC /scannow to see if your problem is resolved.
Repair Your System Health Using dism Command
If none of the above methods work, let’s try repairing our system’s health. To do so, we use the dism command that scans the entire Windows to find corrupt files. If found any, it will try to fix each of them.
On your Windows terminal, type dism /online /cleanup-image /restorehealth. 
Now, you need to wait for several minutes until it checks and repairs the corrupt files.
Run Command Prompt in Safe Mode
Taking your Windows to Safe Mode is probably the best method to check for a possible system error. If the SFC /scannow command works here, we can confirm that there’s no problem with our default settings.
You can only use the basic drivers when you boot your PC in safe mode. This means most system tools get deactivated until the safe mode is turned off.
Basically, there are several ways to enter safe mode in Windows 11. Let’s focus on two of them in this section.
From System Configuration:
Here’s how you can turn on the safe mode feature from System Configuration on Windows 11:
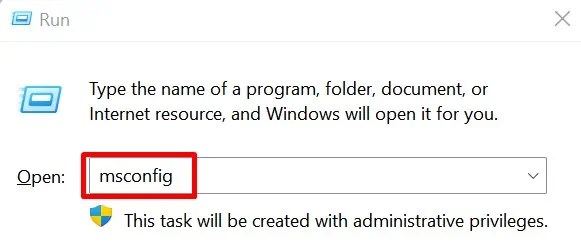
- Navigate to Run by pressing Window Key + R. Here, type msconfig and hit enter.

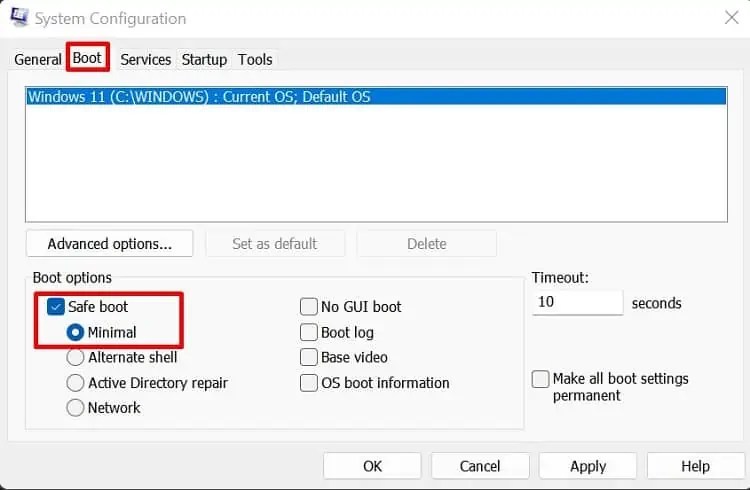
- Next, navigate to the Boot tab.
- Under Boot options, tick the Safe Boot feature. Also, make sure Minimal is selected.

- Then, click on Ok.
- Now, a dialogue box asks you to restart your PC. So, click on Restart.
- Once your PC turns on, launch Command Prompt and check if the scan command works.
From Troubleshoot Mode:
Another technique to start safe mode is from the troubleshooting mode on Windows 11. Go through the steps to learn how to do just that:
- In Start Menu, click on the power button.
- Hold the Shift key and press the Restart icon.
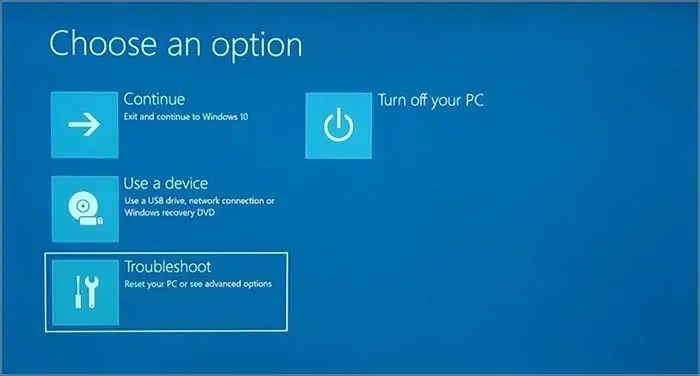
- Wait for a few seconds to launch the Choose an option window.
- Next, choose Troubleshoot.

- Then, navigate to the Advanced options.
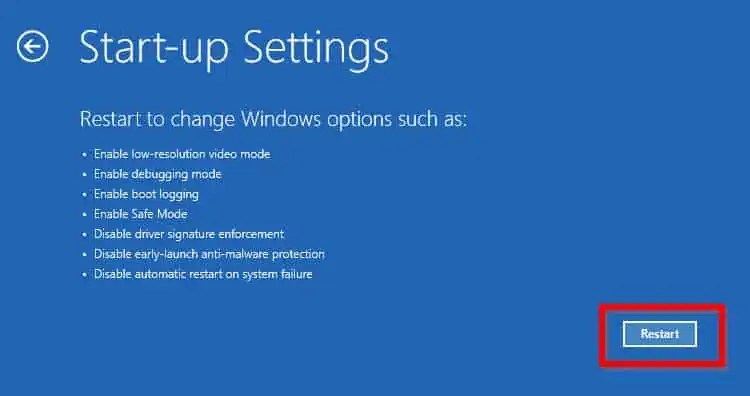
- Now, select Startup Settings and select restart.

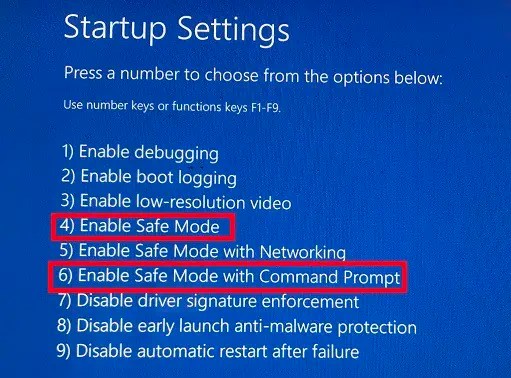
- Upon rebooting, you’ll get a list of options. You can either pick F4 or F6. Choose F4, and you can go to Command Prompt to try the SFC command again. On the other hand, choosing F6 will directly open the terminal window in safe mode.

Fix Problems Using System Restore
System Restore may sound like you’re going to reset everything. But, the truth is that it simply reverts the changes we made to our PCs and saves them as restore points.
Read the step-by-step guidelines on how you can fix the SFC scan issues using system restore:
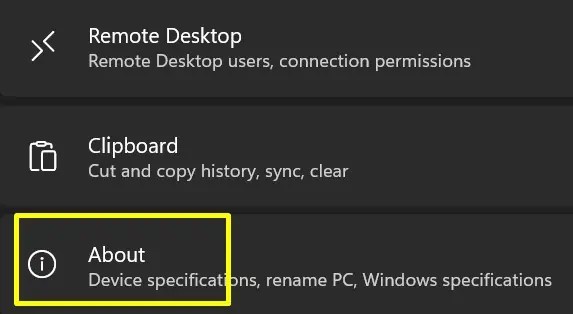
- Navigate to Settings, and under System, select About.

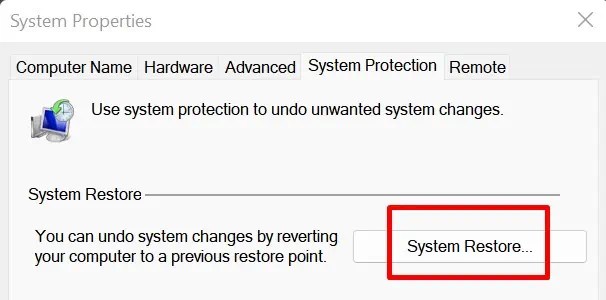
- Next, choose the System protection tab. This opens the System Properties window.
- Now, click on the System Restore button.

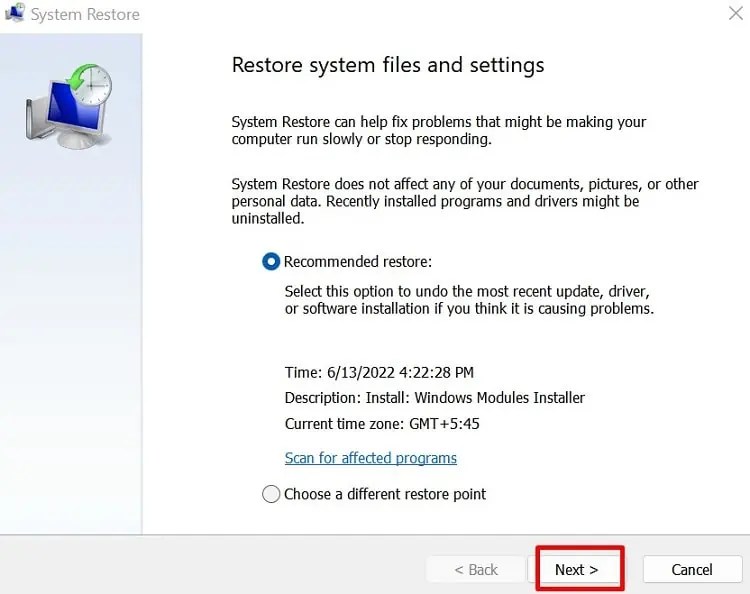
- Either select the Recommended Restore Point or Choose a different restore point. Then, click on Next.

- Finally, click on Finish to restore the system and click on Yes to confirm your action.
Try Using Command Prompt in Recovery Mode
If the SFC /scannow command is still not working, try to use the same line in recovery mode. The following guide will assist you in doing just that:
- Press F11 or the boot key you normally use to enter the recovery mode when Windows begins its booting sequence.
- Now, navigate to Command Prompt.
- Here, type the following command:
SFC/Scannow /OFFBOOTDIR=[Your System Drive]:\ /OFFWINDIR=[Your System Drive]:\windows - Finally, exit the recovery mode and restart your PC.
- Then, check if the SFC scannow command works.
Repair Your Computer Using a Bootable Disk
As you have explored all the options, it’s time to repair your PC using a bootable Pendrive. Please read our other articles that guide you on using Rufus to download Windows 11 and installing it from a bootable USB.
Next, follow the steps below to learn how to repair your computer:
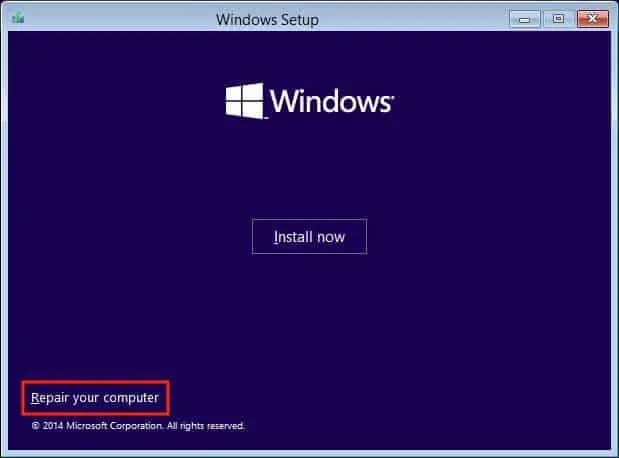
- Boot Windows 11 and wait for the installation screen to appear.
- From the bottom-left corner, choose Repair your computer.

- Next, navigate to the Advanced Troubleshooting option and choose Startup Repair.

- Proceed with the steps and complete the repairing process.
- Finally, restart your device and run the SFC /scannow command on Command Prompt again.
Reinstall Windows 11
If none of the above techniques work, the last option is to reinstall Windows 11. This way, all your system files will be replaced, and the SFC scannow command will definitely work.
Well, you can try reinstalling the operating system using a bootable USB or from the in-built Windows Recovery Mode. Indeed, you can try out every method we have discussed in our other article.
